Today I want to share with you these super cute decorated kitten cookies. They are made with vanilla and cocoa flavored sugar cookie dough. I used a cat cookie cutter but feel free to use whatever animal cookie cutter you have at home. These cookies are tasty, they have a delicate buttery flavor combined with vanilla and cocoa. They are crispy and they melt in your mouth at the same time. But the best part: they are super fun and easy to make, and the results are amazing!

Of all my recipes, this is one of the best birthday cookies ideas. If you are planning a birthday party soon, you should also check out the recipe for my Easy Birthday Cookies, for the best funfetti cookies.
How to make vanilla and cocoa kitten cookies?
These are roughly the steps we’re going to follow to make these cookies:
- Make the dough and refrigerate.
- Separate the dough into 3 parts: color one of them yellow. Combine another one with the cocoa powder.
- Roll out the uncolored dough on parchment paper and place small balls of colored dough on top. Roll out again so that the “spots” stick to the base.
- Freeze the rolled dough for a few minutes.
- Cut with a cookie cutter.
- Bake and let cool.
- Decorate the faces with the melted chocolate and wrap individually once dry or store in a container.
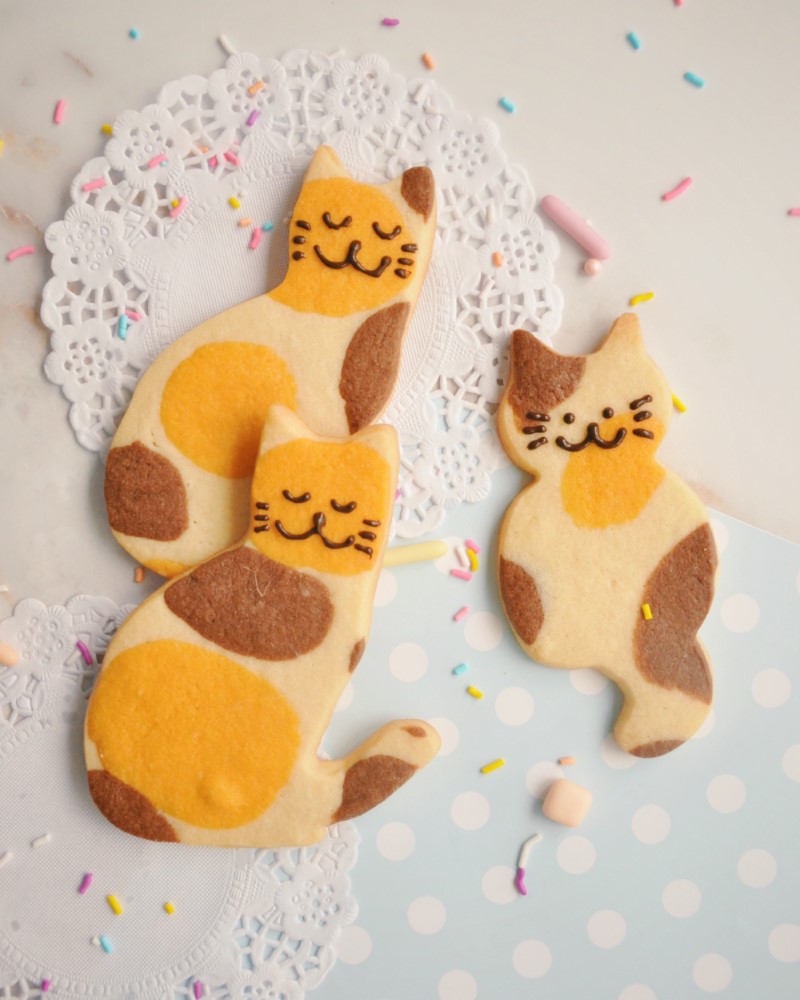
Can this recipe be made with kids?
Yes! These cookies can definitely be made with the little ones in the house. The easiest and most entertaining steps are to color the dough and place the balls on the base. Also, the older kids can draw the kitty faces with the chocolate.
I don’t recommend kids cutting the dough since we’re cutting it frozen and it might be hard for them.

Baker’s tips:
Color substitution
If you want other colors for the animal’s spots you can substitute them for the colors of your choice. Keep in mind that the stronger colors require a lot of food coloring.
What to do with the leftover dough after the first cut?
Easy! Don’t discard the cutouts. We simply smash them all together without kneading. Check the dough for the side that has less visible colored spots. That side will be the upside. Roll out, add some more colored balls and continue to roll and cut like the first time.
Bake evenly
If you are going to make different size cookies, you should separate the cookies by size and bake them on different trays since the smaller ones tend to burn when baking at the same time as the larger ones.
Can I make this cookies ahead on time?
So you’re making this recipe for an event and want to make work in advance, or just want to have them in the freezer ready to bake. No problem! I recommend freezing the already rolled sheets of dough with the colors on top. You can also freeze the cookies already cut. In that case, cut, completely freeze the cookies on a tray and once frozen, place in an airtight container with parchment paper between each layer, then freeze again. They can be baked directly from the freezer, adding a minute or two of baking time.

How to keep the dough/ cookies fresh?
Unbaked dough can last up to a week in the fridge or up to 3 months in the freezer. Once baked, it is ideal to consume within a week. Store in an airtight container at room temperature or individually wrapped in bags.
Super Cute Vanilla and Cocoa Kitten Cookies
Ingredients
- 200 g Unsalted Butter Softened
- 150 g Granulated sugar
- 2 tsp Vanilla extract
- 1 egg
- 320 g All-purpose flour
- 1 Pinch of salt
- 2-3 tsp Cocoa powder
- Some drops of yellow or orange food coloring
- 80 g Dark chocolate or candy melts to draw the cat faces
Instructions
- In a bowl, beat the softened butter with the sugar and vanilla extract until light and fluffy. Add the egg and mix. Scrape the sides of the bowl to combine all the ingredients well. Sift the flour with the salt and add to the mixture. Finish mixing until combined.
- Transfer the dough to the counter and form a ball with your hands without kneading too much. Cover with plastic wrap and refrigerate for half an hour.
- Remove from the fridge and remove two pieces from the dough, like a dumpling size each. Dye one of the pieces with yellow food color. Start with a couple of drops first, then add more if necessary. Add the cocoa powder to the other piece of dough and knead until fully colored.
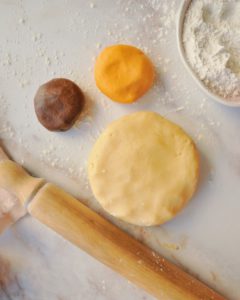
- On a silicone sheet or parchment paper, roll the uncolored dough to ½ inch thick. Then add small balls of the yellow and cocoa-colored dough, pressing lightly.
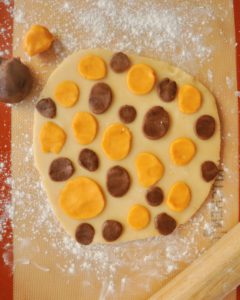
- Place parchment paper on top and finish rolling until it reaches ¼ inch thickness. Place in the freezer on a tray for 10 minutes.
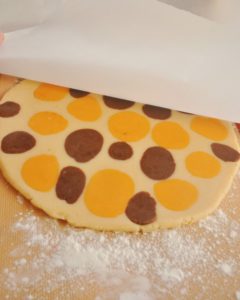
- Remove from the freezer and cut with a cookie cutter. Place the cookies on a tray lined with parchment paper leaving a little space in between. With the rest of the dough, make a bun and roll, and cut again. You can add more colored balls if necessary.
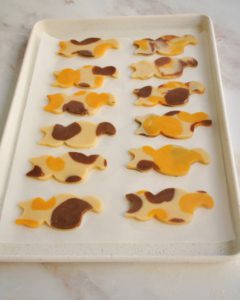
- Bake in a preheated oven at 180°C or 355°F for 14-15 minutes, until the edges are lightly golden. Cool before decorating.
- For the kitty faces, melt the chocolate in the microwave in 30 seconds intervals. Once melted fill up a piping bag and cut a small hole in the tip to pipe the faces. They can also be left undecorated.




how amazing
Thanks Andrea ;D